Customize your Medusa and Contentful Integration
In this document, you’ll learn how to customize the Contentful integration with Medusa and how to customize the Gatsby storefront that is connected to Contentful.
Overview
Part of what makes the integration between Medusa and Contentful powerful is that it’s completely customizable.
On the server, you can create Contentful migrations that allow you to add or edit Content Types in Contentful. Although this can be done through Contentful’s interface, this solution allows you to create a reusable codebase for your store that is independent of a specific Contentful Space.
On your storefront, you can add any necessary components that can render the Content Types you create.
As an example to explain this process, in this documentation, you’ll create a migration that creates a Rich Text content model in Contentful and edits the Page and Product content models to allow using Rich Text content as a tile in pages and products. Then, you’ll modify the Gatsby storefront to render the Rich Text content model.
Prerequisites
It’s assumed you already have set up a Medusa server integrated with Contentful and have a Gatsby storefront integrated with Contentful. If not, please follow this documentation first.
Create a Contentful Migration
The Contentful migrations are located in the contentful-migrations directory in the Medusa Contentful server starter. So, if you want to create your own Contentful migrations, you can create them under that directory.
Here’s an example of a migration created in a new file contentful-migrations/rich-text.js:
#! /usr/bin/env node

require("dotenv").config()

const { runMigration } = require("contentful-migration")

const options = {
  spaceId: process.env.CONTENTFUL_SPACE_ID,
  accessToken: process.env.CONTENTFUL_ACCESS_TOKEN,
  environment: process.env.CONTENTFUL_ENVIRONMENT,
  yes: true,
}

const migration = async () => {
  await runMigration({
    ...options,
    migrationFunction: function (migration, context) {

      // create Rich Text content model
      const richText = migration
        .createContentType("richText")
        .name("Rich Text")
        .displayField("title")

      richText.createField("title").name("Title (Internal)").type("Symbol")
      richText.createField("body").name("Body").type("RichText")

      // edit Page content model
      const page = migration.editContentType("page")

      page.editField("contentModules").items({
        type: "Link",
        linkType: "Entry",
        validations: [
          {
            linkContentType: ["hero", "tileSection", "richText"],
          },
        ],
      })

      // edit Product content model
      const product = migration.editContentType("product")

      product
        .createField("contentModules")
        .name("Content Modules")
        .type("Array")
        .items({
          type: "Link",
          linkType: "Entry",
          validations: [
            {
              linkContentType: ["richText"],
            },
          ],
        })
    },
  })
}

migration()


This example creates a new content model Rich Text that has two fields: title and body. It also edits the Page content model to allow using Rich Text content models on the page.
In addition, it edits the Product content model by adding a new field contentModules. This field accepts an array of sections that can be of type Rich Text. This allows you to display rich details on a product page.
You can also add other types of content models the contentModules should accept. For example, to accept tileSection add it to the linkContentType option:
product
  .createField("contentModules")
  .name("Content Modules")
  .type("Array")
  .items({
    type: "Link",
    linkType: "Entry",
    validations: [
      {
        linkContentType: ["richText", "tileSection"],
      },
    ],
  })
Run a Contentful Migration
To run a Contentful Migration that you create you can use the following command:
node <file_path>
Where <file_path> is the path of the file you created.
To run the Contentful migration in the previous example, you can use the following command:
node contentful-migrations/rich-text.js
This runs the Contentful migration in that file and makes the necessary changes in your Contentful Space.
Test if Contentful Migration Worked
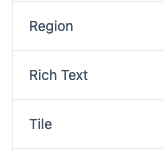
To check if the above migration worked, in your Contentful Space dashboard go to Content Models from the navigation bar. You should see the new content model Rich Text.
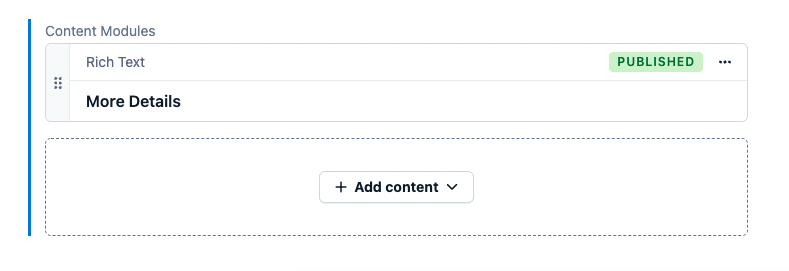
The above migration also allows you to add Rich Text content to pages. To test this out, go to Content from the navigation bar and choose Page in the select field next to the search bar. This shows the available pages in your Contentful Space.
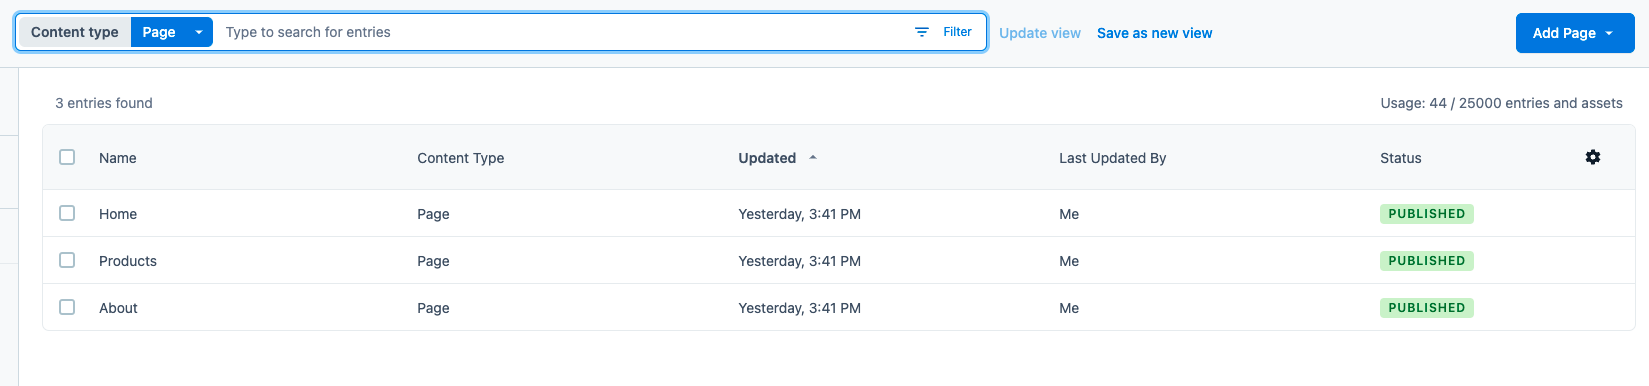
Choose one of the pages. For example, the About page. Then, scroll down to the Add content button. If you click on it, you should be able to choose Rich Text under New Content.
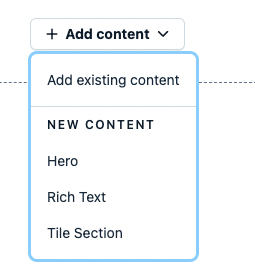
Click on Rich Text and a new form will open to create new Rich Text content. It has the same fields that you defined in the migration file.
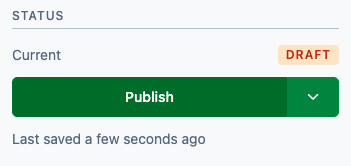
After adding the content you want, click on the Publish button on the right then go back to the About page editor.
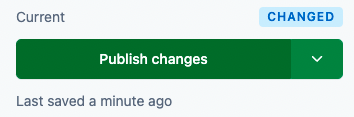
Similarly, in the About page editor, click on the Publish Changes button on the right to view these changes later in the storefront.
Similarly, you can add Rich Text content to any product page.
Render New Content Models in the Storefront
After creating a new content model in your Contentful Space, you must add the necessary component to render it in your Gatsby storefront.
Create Component
To render the Rich Text content you created in the previous example, create the file src/components/rich-text/rich-text.js with the following content:
import React from "react"
import { renderRichText } from "gatsby-source-contentful/rich-text"

const RichText = ({ data }) => {
  return (
    <div style={{
      maxWidth: "870px",
      margin: "0 auto",
      paddingTop: "20px",
      paddingBottom: "20px",
    }}>
      {data.body ? renderRichText(data.body) : ""}
    </div>
  )
}

export default RichText
This creates the component RichText responsible for rendering the Rich Text content model. Notice that the fields of the content model are available under the data prop variable.
Render Component in a Page
Since the Rich Text model can be added to any page, you must edit src/pages/{ContentfulPage.slug}.js to show it.
In src/pages/{ContentfulPage.slug}.js, import the RichText component at the top of the file:
import RichText from "../components/rich-text/rich-text"
Then, in the returned JSX add a new case to the switch statement:
switch (cm.internal.type) {
  // ...
  case "ContentfulRichText":
      return <RichText key={cm.id} data={cm} />
  default:
    return null
}
If the content model of a tile is Rich Text, you’ll display it with the RichText component.
Finally, to retrieve all necessary data of the Rich Text content, in the query GraphQL variable add the following after the ... on ContentfulTileSection fragment:
export const query = graphql`
        # find the following line
        ... on ContentfulTileSection {

        }
        # add the following
        ... on ContentfulRichText {
          id
          body {
            raw
          }
          internal {
            type
          }
        }
      }
    }
  }
`
Test Rich Text in Page Content
To test this out, run your Medusa server by running this command in its directory:
npm run start
Then run the Gatsby storefront by running this command in its directory:
npm run start
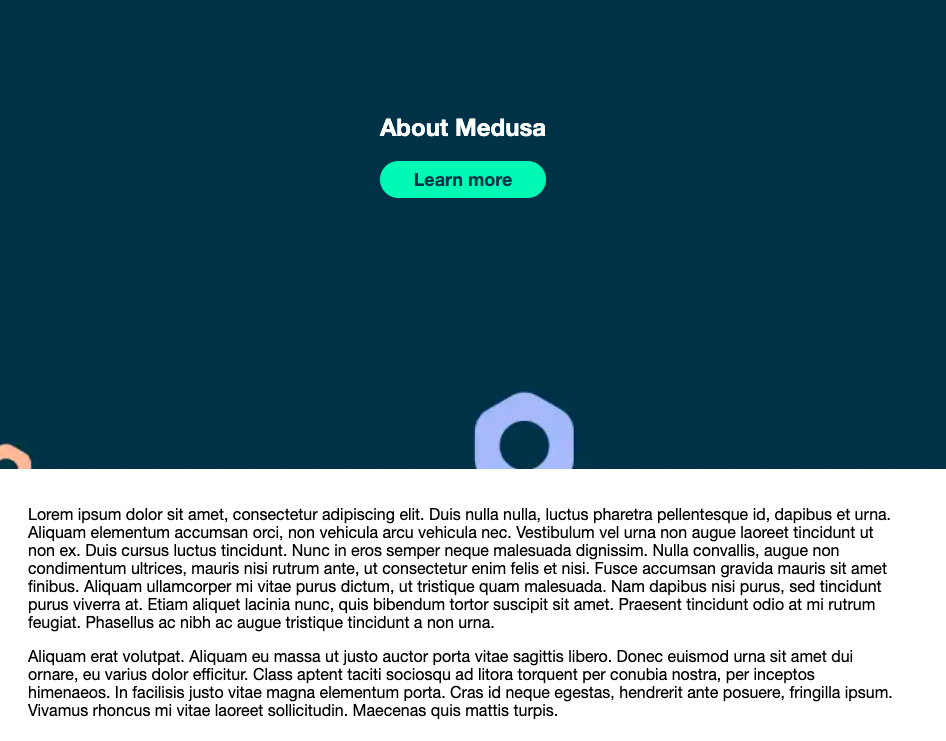
This runs the Gatsby storefront on localhost:8000. Go to the storefront in your browser and open the About page. You should see the Rich Text content you added.
Render Component in a Product Page
In the example migration, you also edited the product page to include a new Content Modules field that allows inserting Rich Text content.
To render them on the Product Page, add the following in the GraphQL query defined in the query variable inside product:
export const query = graphql`
  query ($id: String!) {
    product: contentfulProduct(id: { eq: $id }) {
      # Other fields
      contentModules {
        ... on ContentfulRichText {
          id
          body {
            raw
          }
          internal {
            type
          }
        }
      }
    }
  }
`
If you added other accepted Content Models to the contentModules field of the Product content type, make sure to add them here.
Then, in src/views/product.js import the RichText component:
import RichText from "../components/rich-text/rich-text"
And in the returned JSX add the following before the last </div>:
<div className={styles.contentModules}>
  {product.contentModules?.map((cm) => {
    switch (cm.internal.type) {
      case "ContentfulRichText":
        return <RichText key={cm.id} data={cm} />
      default:
        return null
    }
  })}
</div>
If you added other accepted Content Models to the contentModules field of the Product content type, make sure to add cases for them here to display them.
This loops over contentModules and if the type of the content is Rich Text, it is rendered with the RichText component.
Test Rich Text on a Product Page
Restart the Gatsby storefront then open a product that you added Rich Text content to. You should see the Rich Text component at the end of the page.
See Also
- Deploy your Medusa server to Heroku, Qovery, or DigitalOcean.
- How to deploy your Gatsby storefront to Netlify.